Set up Integration with BigCommerce
This page is for MYOB Acumatica consultants
Check all changes in a test environment before taking them live. Make sure all related features still work as expected and that your data is unaffected.
MYOB Acumatica offers native integration with BigCommerce. You can sync various types of entities and data between MYOB Acumatica and BigCommerce, such as Customers, Customer Locations, Stock Items, Non Stock Items, Template Items, Product Image, Sales Orders, etc. This guide will cover the basic setup for the integration between MYOB Acumatica and BigCommerce.
This applies to MYOB Acumatica version 2021.117.400.6951 [21.117.0037] and later.
1. Create and configure a BigCommerce store
-
Go to BigCommerce website, sign up and set up for a new BigCommerce store, following their Creating a trial store instructions.
-
Make sure you've set up the most important Bigcommerce settings:
-
Store profile
-
Currencies
-
Payments
-
Shipping
-
-
Delete any BigCommerce demo data that you don't need, including customers, customer groups, products and product categories, and archive the existing sales orders as well.
2. Setup integration in MYOB Acumatica
- Go to Enable/Disable features (CS100000), and enabled these features:
- Inventory
- Business Account Locations
- Commerce Integration
- BigCommerce Connector
- In the Customer Classes screen (AR201000), create a new customer class for BigCommerce customers. In this screenshot we're calling the class ECUSTOMER.

- In the Numbering Sequences screen (CS201010), create new numbering sequences that will be used for importing new customers and customer locations from BigCommerce.

- Create a customer to use for guest orders from BigCommerce.

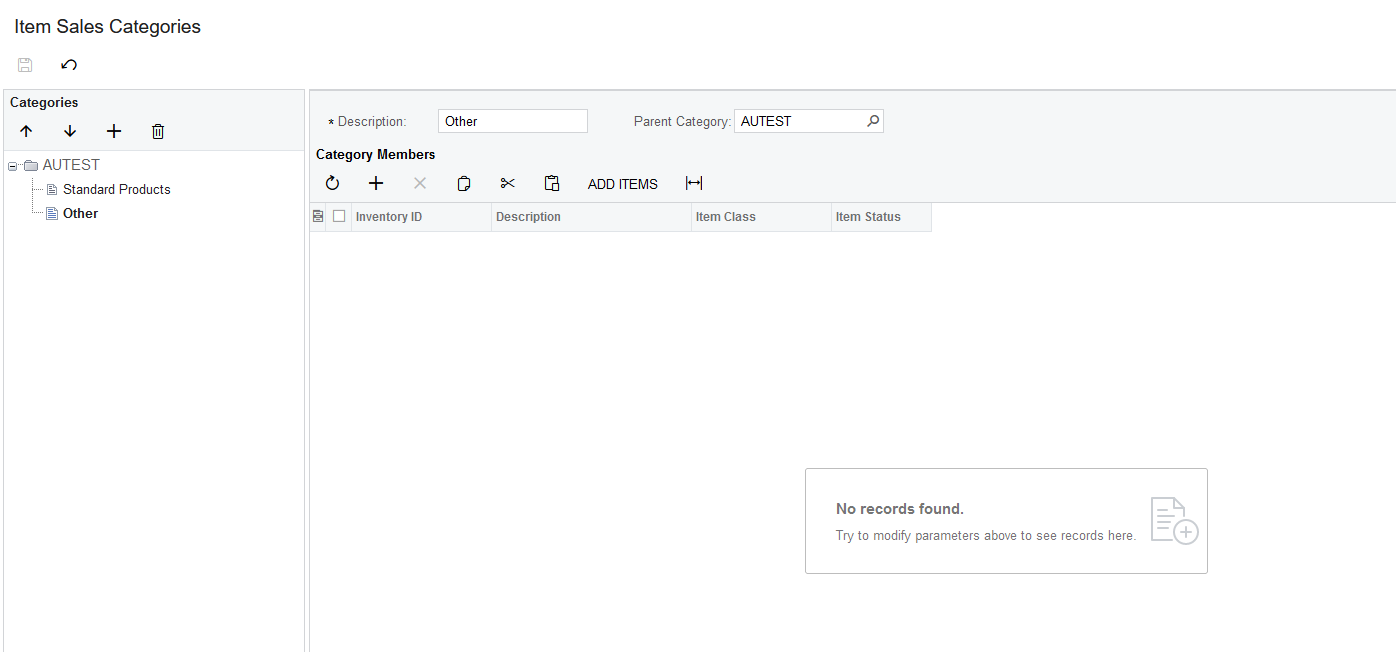
- In the Item Sales Categories screen, create a new category called Other which will be used for stock and non-stock items imported from BigCommerce that don’t have their own categories.

- In the Order Types screen (SO201000), create two order types, one for E-Commerce sales orders which is based on the SO Order Type template, the other one is for E-Commerce return orders which is based on the RC Order Type template.

- In the Ship via Code screen (CS207500), create a ship via code for sales orders from BigCommerce, if necessary.

- Create a new payment method for BigCommerce, add a cash account into that payment method, and assign the new payment method as the default payment method for the new guest commerce customer.

3. Capture store connection information
- Log on to your store admin page by entering https://<yourStoreURL>/manage/. In the navigation menu on the left, click Advanced Settings > API Accounts and then Create API Account.

- For the Account type, select Create V2/V3 API token. Enter a name for the API account. In the OAuth scopes area, set the highest (rightmost) access rights to every setting. Click Save when finished.

- After you click save, BigCommerce will generate a Client ID, Client secret, and Access token. Copy these values and store them in a safe place. In this step, if you’re using Chrome, Firefox or Edge, a download for a .txt file will also be automatically triggered. Make sure you save this text file, as it used to connect between the store and MYOB Acumatica.

- Go to Server Settings > File Access (WebDAV) and copy the WebDAV details for the store and save them in a secure place.

4. Connect MYOB Acumatica with BigCommerce
-
In MYOB Acumatica, go to the BigCommerce Stores screen (BC201000), and create a new store.

-
Enter the Store Admin Path, which is the Store URL and the /manage suffix, for example: https://<yourStoreURL>/manage,.
- Enter all the connection information from BigCommerce, including the API path, Client ID, Access token, WebDAV path, WebDAV username and WEBDAV Password into the store.
Refer to the .txt file that was automatically downloaded when you created the API account above. When entering the API Path, you need to enter the API path without the version
- Click Test Connection. If the test is successful, you have successfully established a connection between BigCommerce and MYOB Acumatica.
