This page explains how to set up system email accounts and exchange integration. Depending on your requirements, one option might suit you better than the other:
-
Option 1: System email accounts – Used for sending emails directly from MYOB Acumatica, such as reports or notifications.
-
Option 2: Exchange integration – Connects MYOB Acumatica to Microsoft Exchange for synchronising emails, contacts, and calendars.
Although the steps below use Azure Online as an example, you can follow the same steps when setting up an Exchange Online (Office 365) account.
Before getting started
- To prevent errors when sending emails, set up SMTP authentication.
- This page is only for setting up email authentication. If you're interested in setting up single sign-on (SSO), see Integrating MYOB Acumatica with Microsoft Entra ID.
Option 1: Set up a system email account
-
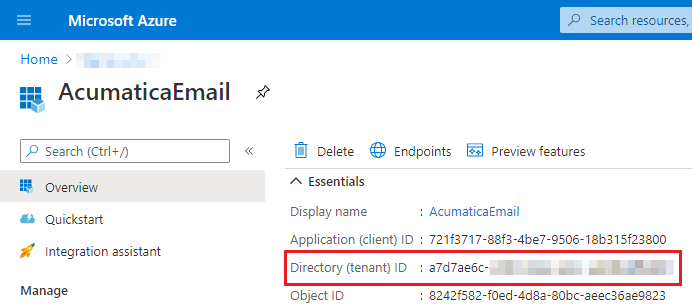
On the Microsoft Azure Portal, complete steps from the Register an application with the Microsoft identity platform section. On the Overview page, copy the following values which will be used in the MYOB Acumatica setup:
-
Application (client) ID
-
Directory (tenant) ID
The example of these values are shown in the following screenshots.

-
-
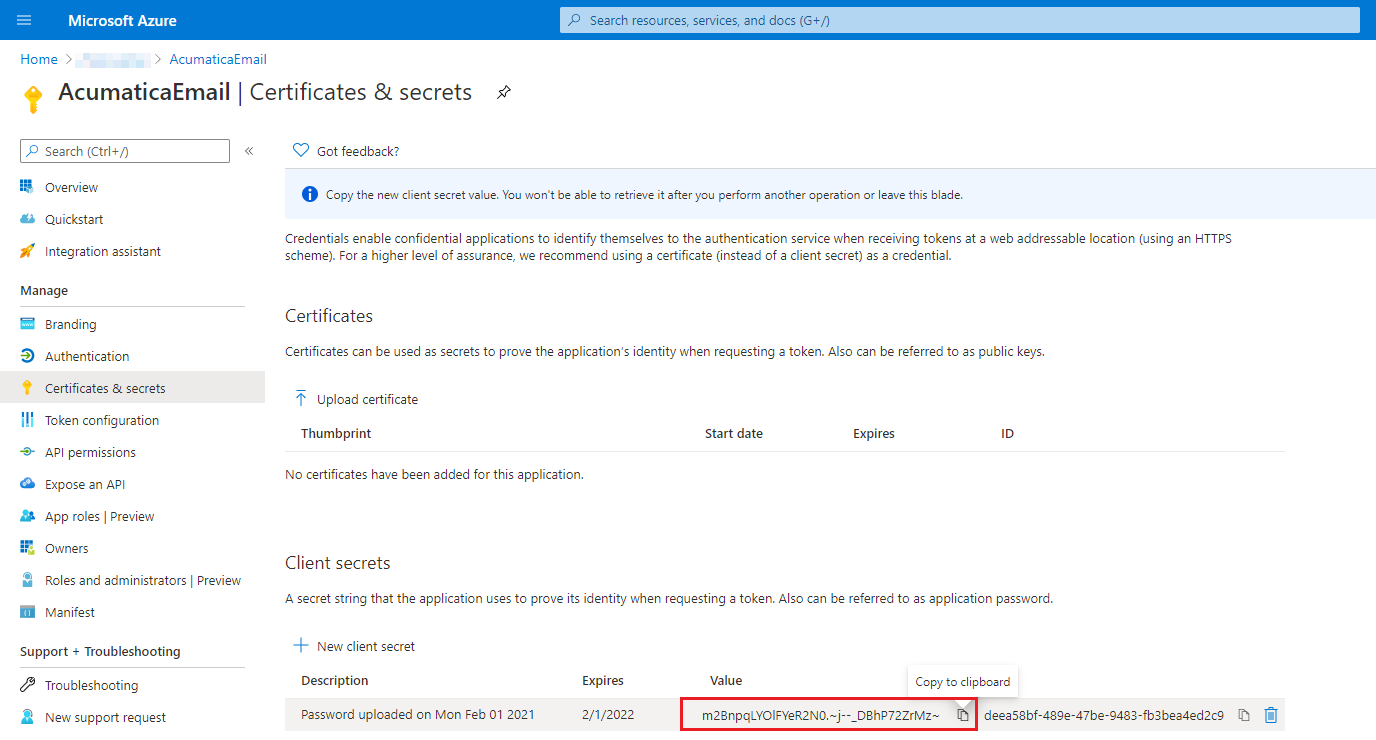
On Microsoft Azure Portal, complete steps from the Add a client secret for an application section. Copy the client secret value shown in the following screenshot. The value will be used in the MYOB Acumatica setup. The client secret value:
-
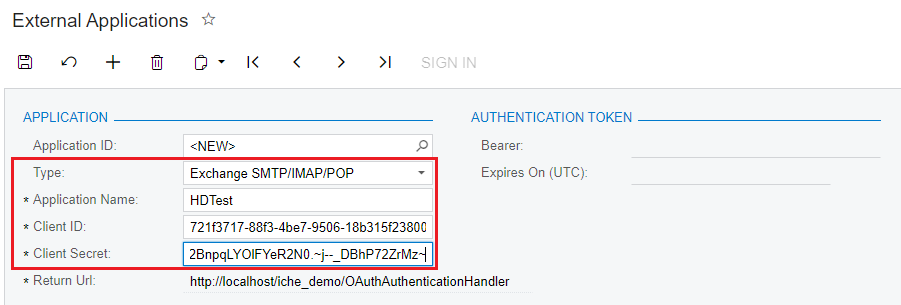
In MYOB Acumatica, on the External Applications (SM301000) screen, create a new record by doing the following:
-
In the Type dropdown, select the Exchange SMTP/IMAP/POP value.
-
In the the Application Name field, specify the application name.
-
In the Client ID field, specify the Application (client) ID value from Step 1.
-
In the Client Secret box, specify the Client secret value from Step 2.
-
Save your changes.
The specified values are shown in the following screenshot.
-
-
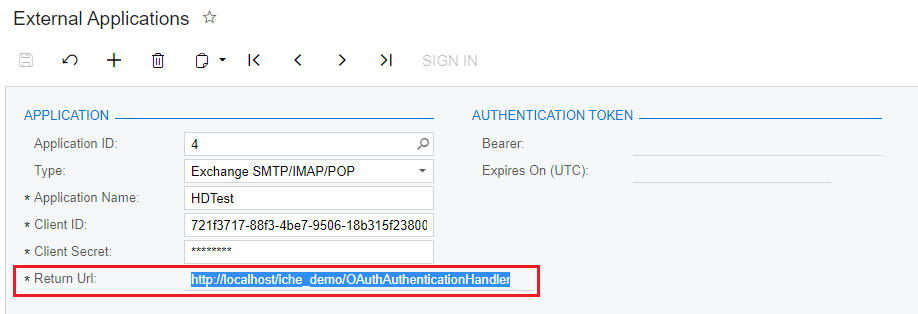
Copy the value from the Return Url field. The value will be used in the next step for the Azure application setup.
-
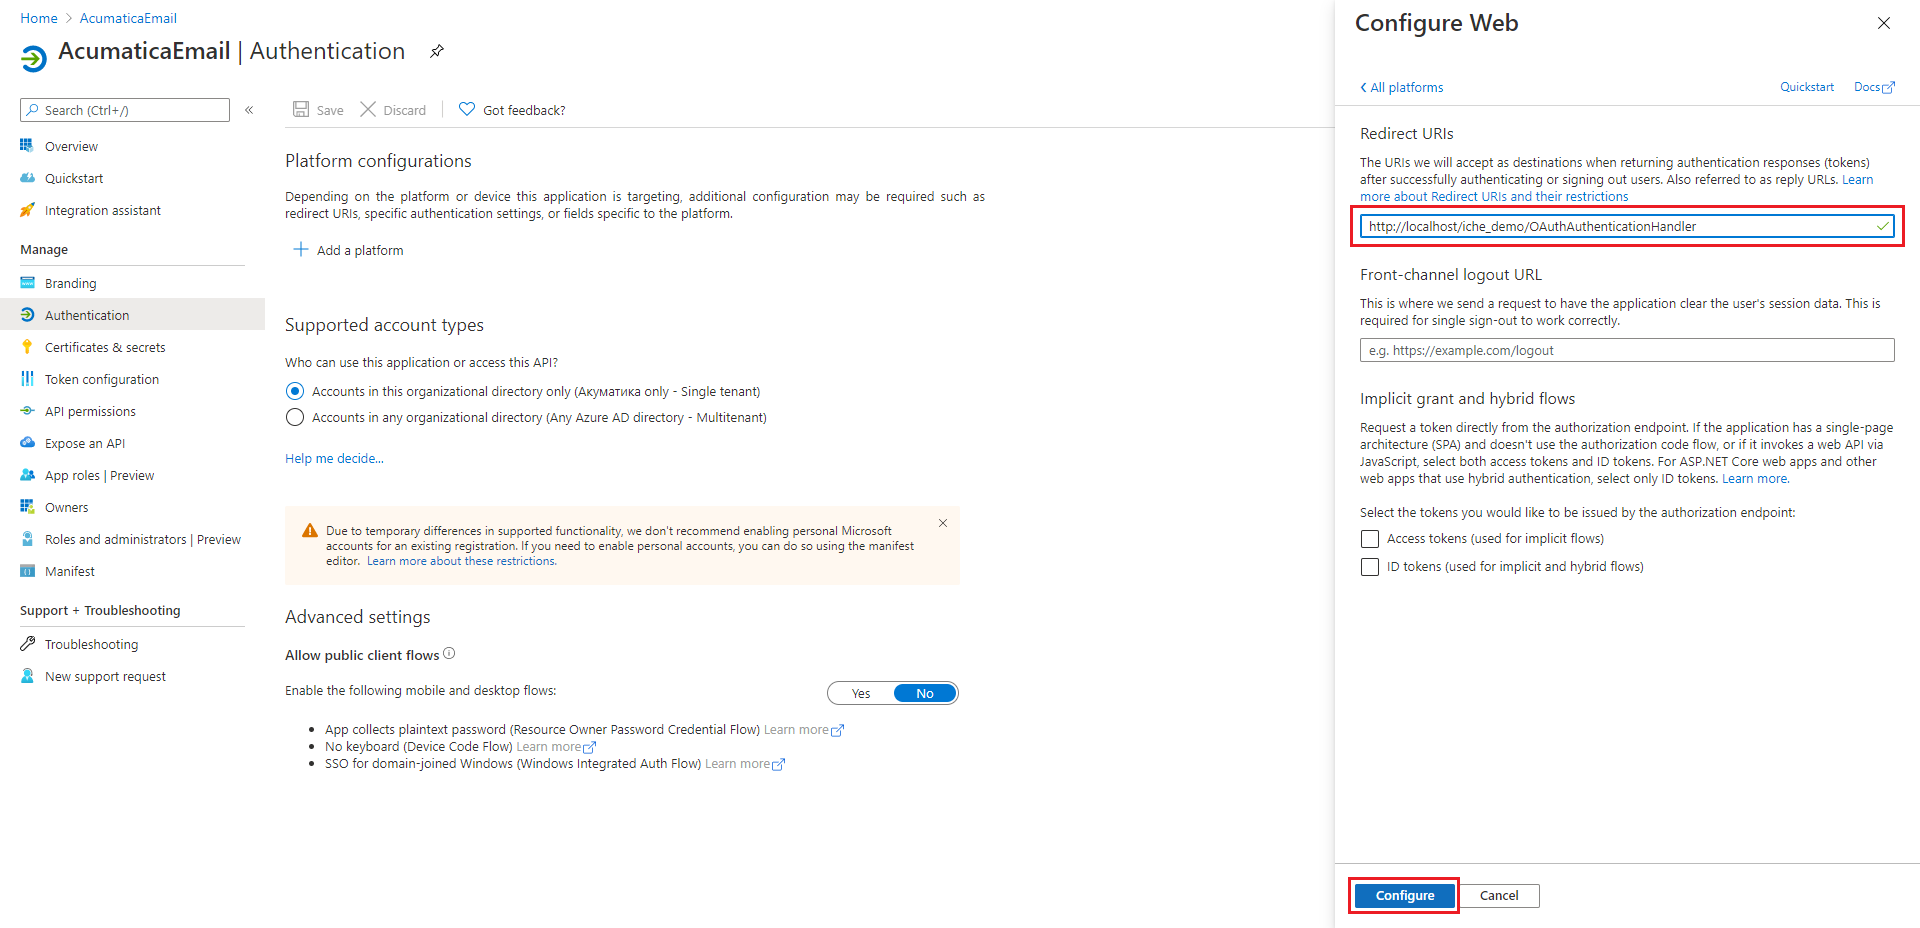
On the Microsoft Azure Portal, complete steps from the Add a redirect URI section as follows:
-
On the Overview page, click the Add a Redirect URI link as shown in the following screenshot.

-
In Configure platforms, select the Web tile as shown in the following screenshot.

-
In the Redirect URI box, specify the Return Url box value from Step 4.
-
Click the Configure button.
The following screenshot demonstrates instructions c and d.
-
-
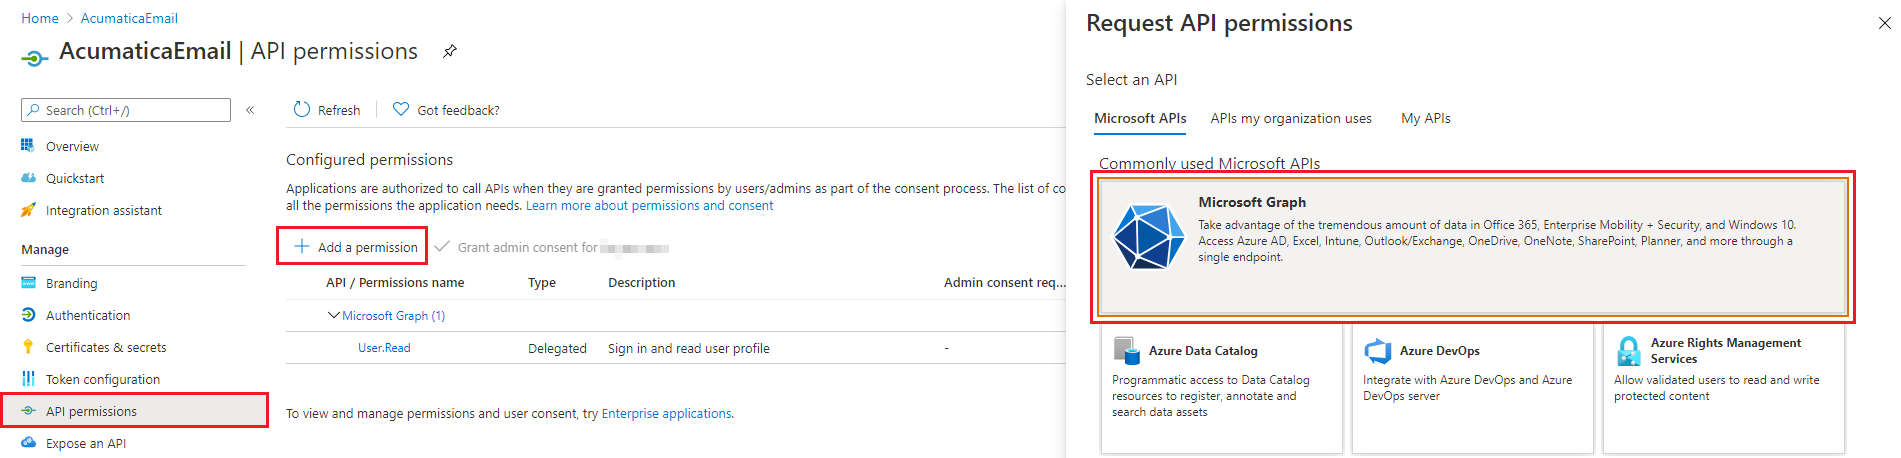
On the Microsoft Azure Portal, complete steps from Application permission to Microsoft Graph to grant the needed delegated permissions as follows:
-
Select API permissions > Add a permission > Microsoft Graph as the following screenshot shows.
-
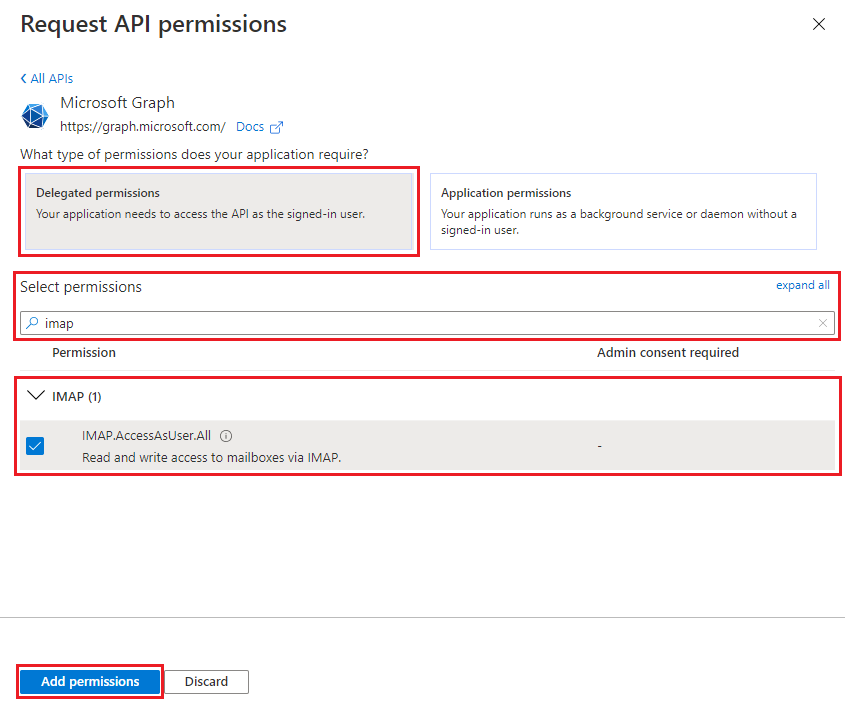
Select Delegated permissions.
-
Select the following permissions:
-
offline_access
-
IMAP.AccessAsUser.All
-
SMTP.Send
-
POP.AccessAsUser.All if needed (however, using POP3 not recommended in MYOB Acumatica in general)
-
-
Click Add Permissions button as shown in the following screenshot.
-
-
In MYOB Acumatica, on the Email Account (SM204002) screen, create a new record.
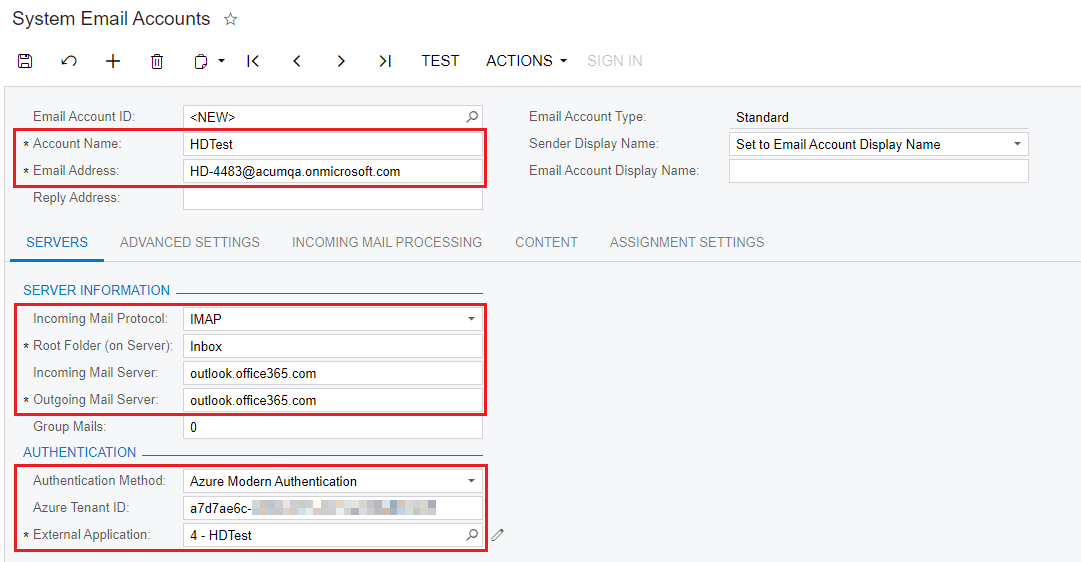
On the Servers tab, specify the following values:-
In the Account Name field, specify the account name.
-
In the Email Address field, specify the email address.
-
Select the Incoming Mail Protocol needed.
-
Specify the Root Folder field value.
-
Specify the Incoming Mail Server and Outgoing Mail Server fields' values (outlook.office365.com for Azure/Office365).
-
In the Authentication Method dropdown, select either Azure Modern Authentication or OAuth (the label changes depending on your version of MYOB Acumatica).
-
In the Azure Tenant ID field, specify the Directory (tenant) ID value from Step 1.
-
In the External Application field, select the external application created in Step 3.
Example is shown in the following screenshot.
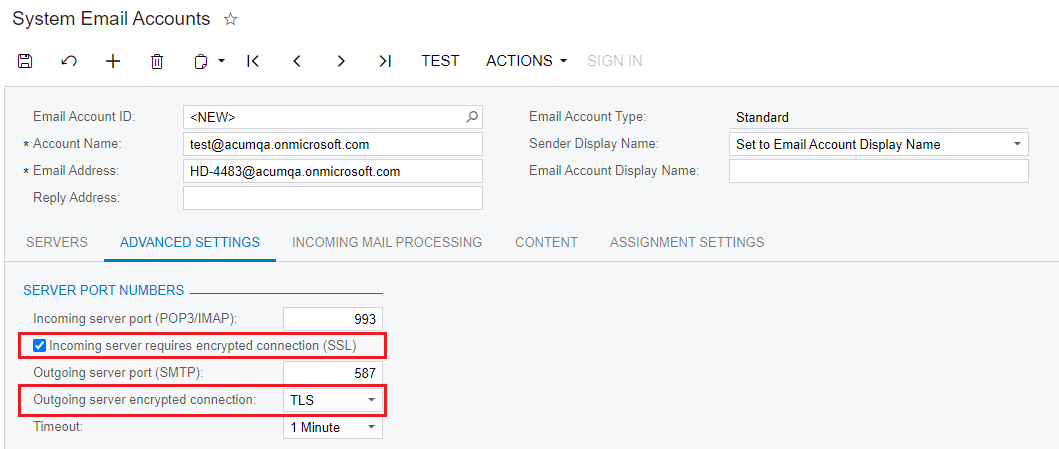
On the Advanced Settings tab, specify the following values:-
If your server supports the encrypted incoming connection, select the Incoming server requires encrypted connection (SSL) checkbox.
-
If your server supports the encrypted outgoing connection, select the TLS option on the Outgoing server encrypted connection.
The tab is shown in the following screenshot.
Save your changes.
-
-
Click the Sign In button. On the Sign in to your account window, select and sign in to your email account as shown in the following screenshot.

-
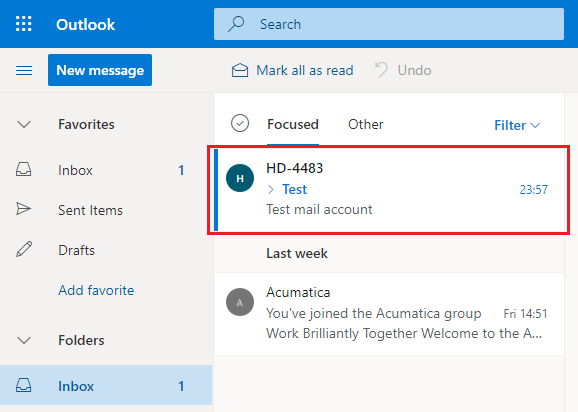
Click the Test button to send a test email to your email account. Verify the test email in your inbox folder. Example is shown in the following screenshot.
The system email account is set up using the Modern Authentication (OAuth 2.0).
Option 2: Set up exchange integration
Account type limitation for shared mailboxes
Email accounts for exchange integration require a licence, as you must log in to the same email account that you send the email from. If you attempt to log in through another mailbox, you might experience authorisation errors.
-
On the Microsoft Azure Portal, complete steps from the Register an application with the Microsoft identity platform section. On the Overview page, copy the following values which will be used in the MYOB Acumatica setup:
-
Application (client) ID
-
Directory (tenant) ID
The example of these values are shown in the following screenshots.
-
-
On Microsoft Azure Portal, complete steps from the Add a client secret for an application section. Copy the client secret value shown in the following screenshot. The value will be used in the MYOB Acumatica setup. The client secret value:
-
In MYOB Acumatica, on the External Applications (SM301000) form, create a new record by doing the following:
-
In the Type dropdown, select the Exchange Online AWS value.
-
In the Application Name field, specify the application name needed .
-
In the Client ID field, specify the Application (client) ID value from Step 1.
-
In the Client Secret field, specify the client secret value from Step 2.
-
Save your changes.
Example is shown in the following screenshot.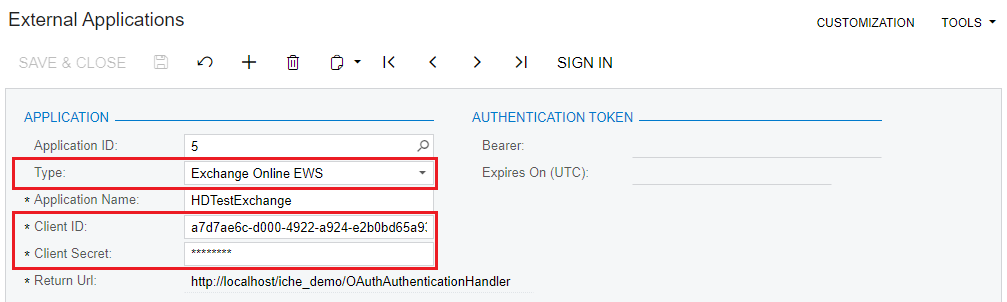
-
-
On the Microsoft Azure Portal, complete steps from Configure for app-only authentication to grant the delegated permissions.
-
On the Exchange Server Configuration (SM204015) screen, do the following:
-
In the Account Name field, specify the account name.
-
In the Email Address field, specify the email address.
-
In the Authentication Method dropdown, select either Azure Modern Authentication or OAuth (the label changes depending on your version of MYOB Acumatica).
-
In the Azure Tenant ID field, specify the Directory (tenant) ID value from Step 1.
-
In the External Application field, select the external application created in Step 3.
-
Save your changes.
The example is shown in the following screenshot.

-
-
Click the Test Server button to test the account settings. The green check box on the form toolbar indicates that the connection is set up.
The Exchange Integration is set up using the Modern Authentication (OAuth 2.0).